How to build Rapport
written by dmarchi
Concept
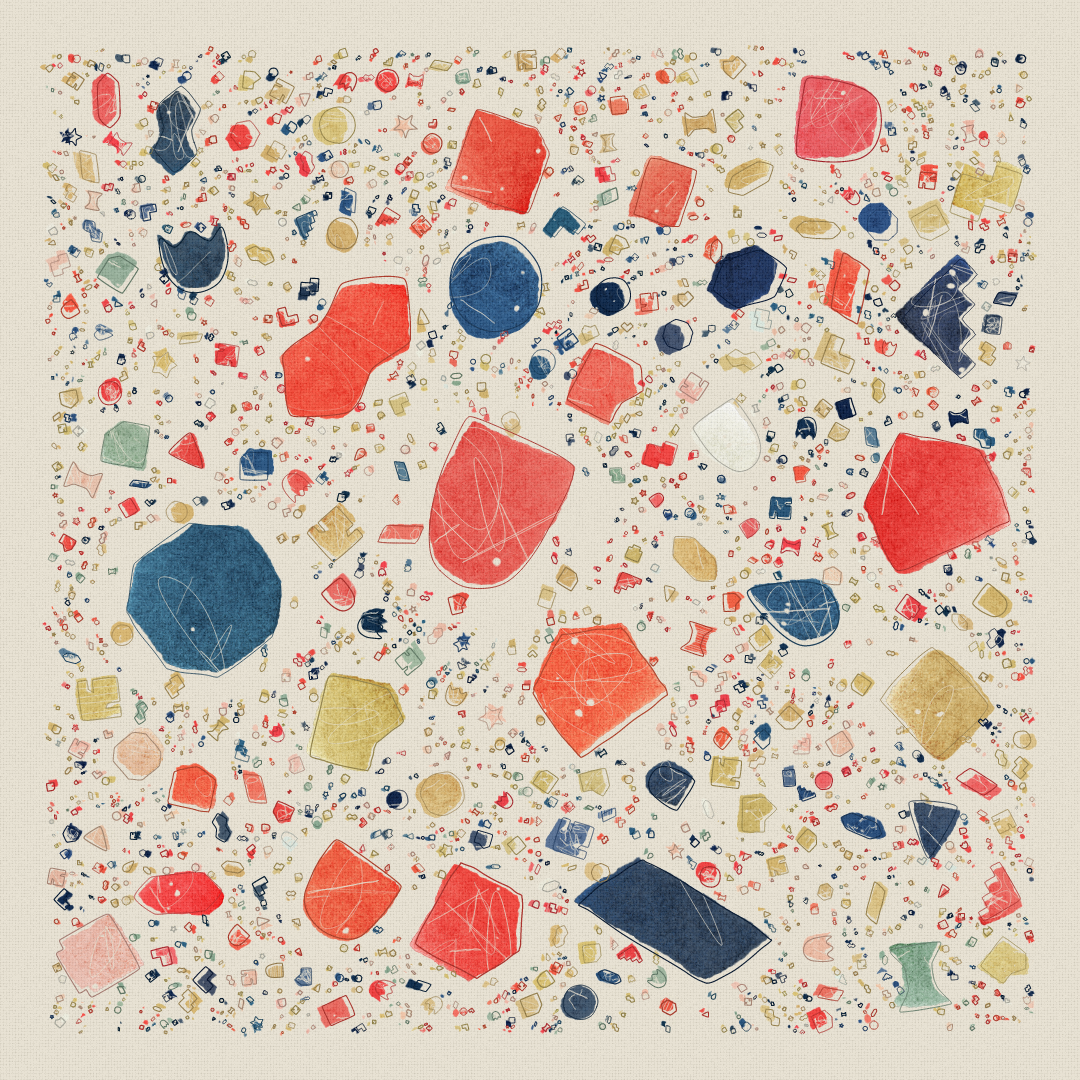
The concept of nexus is a powerful one. It speaks to the idea that everything is related and that each part is necessary to create the whole. Rapport is about the relationship these parts have, harmonious or discordant, to convey a sense of unity and purpose. You are invited to explore the details and interactions of each object in its surroundings, recognizing the immense value they all have in building greater things.
Rapport was originally meant to be a regular fx(hash) collection. During its early stages in development params was released and it got me thinking about how co-creation would be in sync with the proposal of the project: to create the conditions and observe what kind of relations emerge from the system. I believe that inviting collectors as actors in this process will add a beautiful extra layer of abstraction and emotion to the body of the collection.
The information in this article is meant to be a quick guide to help you explore the project in params 💪😎
Parameters
- Density
- Boost Density
- Seed
- Format
- Margin
- Arrangement
- Size Bias
- Shape Variety
- Palette
- Detachment
- Mutation
- Texture
- Mirrored Shapes
Density
Why of all the available parameters would I start with density? Well, depending on your hardware and the settings you choose, it can take some time for the algorithm to finish calculating where each object stands. With that in mind the pro tip I can give you is to play around at a lower density until you familiarize yourself with the possibilities and raise it gradually if you wish.
My first challenge about making a params project was to learn to compromise about my wishes regarding what should be the limits of the algorithm. I tried my best to ensure quality results most of the time, but during development I realized I should be less rigid and give collectors more room to explore. From very sparse to very dense compositions, density can drastically change the dynamics of each output and it is up to you to find that sweet spot where everything works. I trust you 🤝
Boost Density
A special parameter to push the limits of the algorithm when trying to fit elements in. Can drastically increase the time needed to calculate, especially when combined with high Density values. You might want to lock it OFF while you explore. If you're going for a very dense look you should turn it ON at the very end of the creation process to avoid wasting too much time.
Seed
Rapport is a WYSIWYG project, meaning collectors will be able to mint exactly what they build with params. The minter's wallet is used together with the Seed parameter to define what happens in your piece. Play with it to get different:
- placement and characteristics of the shapes
- color distributions for palettes (how often each color is used)
- shape distributions (how often a shape is present in the field)
- settings for each type of arrangement (angles, flow fields, polar coordinates)
Format
International Paper Standards, also known as ISO A sizes, are a widely accepted set of guidelines for paper sizes used across the world. One of the most notable features of these standards is the use of Root paper sizes, which are based on the concept of the square root of 2.
To calculate the dimensions of a Root 2 paper size, you start with a square with sides in the ratio of 1:1. Then, you take the diagonal of this square and use it as the longer side of the Root 2 rectangle, while maintaining the original side length for the shortest side. This results in a rectangle with sides in the ratio of 1:sqrt(2), which is approximately 1:1.41.
By following the same approach, you can generate rectangles with increasingly unequal ratios by replacing the radicand with larger numbers in the square root function. This will result in rectangles with progressively greater differences between the length and width of their sides.
Rapport has five possible aspect ratios and non-square formats can be in Portrait or Landscape mode, amounting to nine possible formats.
- Square ( ratio 1:1 )
- Root 2 ( ratio 1:1.41 )
- Root 3 ( ratio 1:1.73 )
- Root 4 ( ratio 1:2 )
- Root 5 ( ratio 1:2.23 )
Margin
Each piece may have one of the available margins: Extended, Standard, Narrow or Negative.
Arrangement
The arrangement defines how each shape rotates. Five options are available:
- Independent: as the name suggests, each shape is responsible for itself. This setting might fool you as something very chaotic but the result can be surprisingly organic and natural.
- Flow Field: shapes follow an underlying flow field where neighbors are always similar to each other. The result is a fluid and organic look with a sense of unity in the motion.
- Aligned: all shapes are strictly aligned to the same direction, producing an organized and structured composition.
- Radial: all shapes point to a single coordinate, creating a circular motion.
- Polarized: shapes point to the closest of two opposite coordinates.
Size Bias
While impossible to ensure any given size, the choice here is about the general guidelines in place when the algorithm decides how large or small the elements should be.
There are 6 sets:
- Balanced: all-in-one set where you should see most sizes present.
- Large: generally bigger shapes, should have at least one large element present.
- Average: tries to fill the space with mostly medium sized shapes.
- Small: same as above but with smaller shapes.
- Micro: very small shapes, no large elements.
- Contrast: a set where you should have at least one large element and lots of small ones.
Shape Variety
Each element that is drawn on the canvas comes from a pool of base shapes.
Each shape follow its own guidelines to be drawn. Every element is unique in its imperfections and may be further nuanced by the Mutation parameter (more on this below).
To control the variance of shapes in your art you have a few options:
- Full: all shapes in the pool are available
- Trio: pick 3 random shapes from the pool
- Duo: pick 2 random shapes from the pool
- Single: pick a random shape from the pool
Palette
To me one of the most relaxing and joyful aspects of being a designer/artist is to be able to work with colors. To think about the power they have to aggregate, separate, enhance, blend.. colors are so flexible and amazing! ❤️💚💙
In the past I wrote about how I approach color in Bravura, it is a subject I have been fascinated. Every project brings new ideas and ways to refine and balance the use of colors.
Let me spend some time to explain the systems in place here:
- Rapport has 23 predefined color palettes.
- Palettes can have different number of colors.
- Each color in a palette has a property to allow or disallow it from being a background color.
const palette = {
	name: "Example Palette",
	fills: [
		{ bg: true, color: [0, 0, 93] },
		{ bg: true, color: [41, 11, 93] },
		{ bg: false, color: [43, 57, 95] },
		{ bg: false, color: [7, 72, 86] },
		{ bg: false, color: [212, 30, 86] },
		{ bg: false, color: [227, 79, 66] },
		{ bg: false, color: [23, 7, 91] },
		{ bg: false, color: [10, 3, 85] },
	],
}
After a palette is chosen, we go through the sequence:
- Pick a color for the background between those available.
- Remove that color from the array.
- Randomize the chances of each remaining color to be used.
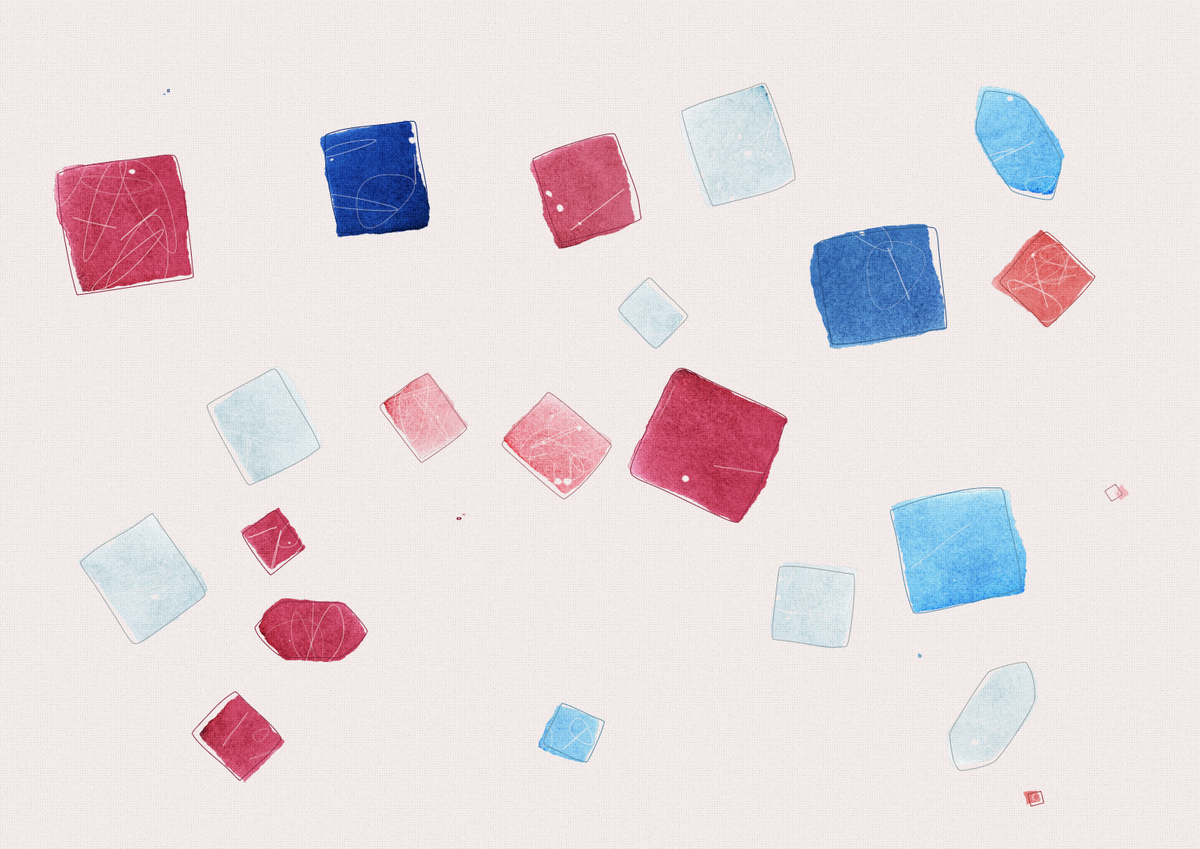
This process give us precise control over which colors we want to use in each palette, but at the same time introduces a lot of possible aesthetic variations for each set of colors. Below you can see variations of the same palette.
- Background: Beige
- White: 65%
- Light Blue: 12%
- Red: 10%
- Yellow: 7%
- Dark Blue: 2%
- Light Grey: 2%
- Light Beige: 1%
- Background: Beige
- Red: 44%
- Light Blue: 21%
- Dark Blue: 13%
- Light Grey: 11%
- White: 6%
- Yellow: 3%
- Light Beige: 2%
- Background: White
- Light Blue: 56%
- Light Beige: 11%
- Yellow: 10%
- Beige: 8%
- Light Grey: 7%
- Dark Blue: 5%
- Red: 1%
On top of that, each color can have its Hue and Brightness slightly shifted for each element that is drawn.
Detachment
The next three parameters are designed to give you some control over the aesthetics of the piece. Detachment defines both the unity between line drawing and painting, as well as the roughness and distortion of the painting.
Mutation
Mutation refers to the nuances of each drawing. Every shape has a unique set of possible deviations that are applied to the element when driven by this parameter. A low setting will produce a more uniform look while the opposite will enrich the overall sense of variety with more irregular shapes.
Texture
As the name suggests, this parameter controls the intensity of the painting texture. You can play with the combinations of colors and textures to find looks that resembles different types of paints and techniques.
Mirrored Shapes
Controls the possibility for the shapes to be drawn mirrored.
Outro
Creating Rapport was a totally different development experience for me. I spent months tweaking and improving the smallest things trying to find the sweet spots to every aspect of the project. It's super interesting to build a params project as it really shifts one's perception about many aspects of the craft and your role as a generative artist. The need to rethink your ways in an environment with increasingly lack of curation/control can be very fruitful.
A big thank you for your time and interest in reading this article. I hope you enjoy Rapport as much as I enjoyed creating it. Have a good one fx(fam)!