Getting Started with Universal Rayhatcher
written by Ethspresso
I am amazed and blown away by all the fantastic creations artists are making with the Universal Rayhatcher by Piter Pasma. This fantastic project is shaping up to become a spectacular collection of art! The possibilities are endless and the rayhatcher framework is very flexible. It can be a challenge to get started though. Let's do that together.
What is a Signed Distance Function (SDF)?
This is always the first question. My take on this is: A SDF is a function. It receives coordinates as input (x,y,z). The task it has is to return a positive number if the coordinates are outside a shape, a negative number if the coordinates are inside the shape, and zero if the coordinates are on the edge of the shape.
Don’t worry about the functions themselves right now, you’ll get a list of useful examples here that you can simply start to use, tweak and combine together.
Piter wrote a great fx(text) article called Rayhatching Evolution that I recommend you read for more background after playing with the project a bit.
First steps
We will be using the Universal Rayhatcher dev environment for all experiements, so start by opening that. It loads a modified fx(lens) environment that looks a lot like the official fxhash params minting experience if you've used that before.
I like to turn the Background option to none before starting to experiment. Backgrounds are useful to build a scene, but in the beginning they might interfere more with the drawing than we want. You can turn on backgrounds later to see how that works.
Don't worry about any of the other params for now. Those are mostly tweaks that you'd only use for the final fine-tuning of a finished art piece. Only focus on the big text box for SDF code for now.
Basic shapes
Universal Rayhatcher is a 3D drawing framework so we'll be working with 3D objects first and foremost. Think spheres, cubes, cylinders and so on. I'll introduce the SDF code snippets for a number of useful shapes first and then show you how to combine them in exciting ways.
Sphere
A sphere is defined with the following formula:
L(x,y,z)-r
Arguments
x,y,z: Coordinates
r: The size of the sphere
How it works
The formula works by measuring the distance to the origin with the L function, and then subtracting a number from that distance to make the result negative for all distances below that number. The bigger the number r, the bigger the 3D area that is returning a negative number and considered to be inside the shape.
Try copying the following example to the SDF code box and hit Refresh:
L(x,y,z)-25
Here's how that can look like after it has drawn for a few seconds, line by line. Notice how the object has light and shadow applied to it, just like other 3D rendered objects would.
Your variant will likely have light and shadow coming from other angles than I got here, because that depends on your wallet address and the title of the art piece. Different wallet addresses in the "Minter address" field and different titles in the "Title seed" field will give you different camera angles and light source locations.
Box
Alright, let's try something else! A box has the following SDF formula:
bx3(x,y,z,a,b,c)
Arguments
x,y,z: Coordinates
a: The size of the box (required)
b: The size of the second side of the box (optional, defaults to be equal to a)
c: The size of the third side of the box (optional, defaults to be equal to a)
Example
Try pasting this example formula in the SDF field (replacing anything you already had there) and hit Refresh:
bx3(x,y,z,10)
Here's how that looks like. Again, your box can have different orientation, light and shadows than this, which is perfectly okay.
If you add in the optional b,c arguments, you'll be able to draw boxes that are rectangular:
bx3(x,y,z,5,10,15)
Another neat trick we can do with the box is to inflate it. You can do that by subtracting a value, like this:
bx3(x,y,z,5,10,15)-8
Inflating a box causes it to have rounded corners. I chose to subtract 8 because that gave a nice effect, you can try increasing the value to inflate it more and see how that deforms the object further. This inflation trick works on any object by the way.
Cylinder
A cylinder is a very useful shape that can be a good building block for more complex scenes.
L(x,y)-a
Arguments
x,y: Coordinates
a: The radius of the cylinder
How it works
Let's take a look at an example:
L(x,y)-15
This formula only consists of two variables, the coordinates x and y. In addition, x happens to be the SDF for a vertical plane and y the SDF for a horizontal plane. The distance L(x) will be zero when x is exactly zero, which results in rendering a plane. But what does it mean to take the length of two SDFs with L(x,y)? The result will be zero when both SDFs are zero, which they are at the intersection point of the two SDFs (the two planes). On its own this would have been rendered as an very very thin line, which is not what we're after. Instead we apply the inflation trick by subtracting a value like 15 and we get a cylinder instead.
One thing to note is that since the z-axis is not part of the formula, the object goes on for infinity in that direction (remember, we're in 3D here). This is in many ways what makes it a cylinder. A different way to say the same is that a cylinder is a bunch of 2D circles, stacked in the z-axis.
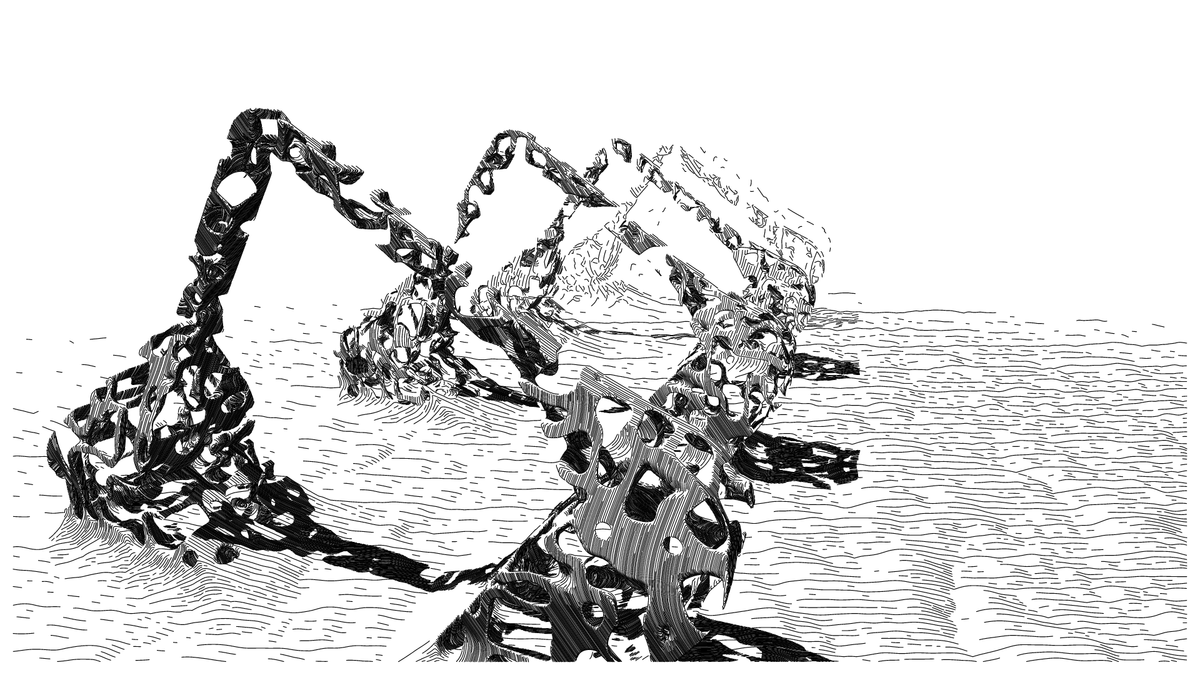
A bent cylinder
L(k(x,y),z)-r
Arguments
x,y,z: Coordinates
r: The radius of the bent shape.
Example
L(k(x,y),z)-5
Bent cylinders look a lot like some of the objects in Piters excellent Industrial Devolution project, as we can see here:
project name project name project name
Donut
don(x,y,z,a,b)
Arguments
x,y,z: Coordinates
a: Donut radius (determines size of entire shape)
b: Amount of empty space in the middle
Example
don(x,y,z,15,5)
Donuts are fun! These are essentially 2D circles repeated around a center point. The official documentation has an example of how you can replace the circle formula with a box formula for a different look.
Repeating shapes
Ok great, we now got a lot of basic shapes we can use as building blocks. And I hear you, you want to make the amazing scenes the other artists are making with Universal Rayhatcher instead of just basic boxes. Let's look at techniques for modifying the shapes to create interesting effects, starting with repetition.
Repetition is a super useful trick to know. There are multiple ways to repeat shapes in Universal Rayhatcher. I'll use cylinders for these examples because they look great when repeated. Our starting point is a single, small cylinder:
L(x,y)-.5
What we have here is a cylinder drawn in the center of the scene, meaning exactly along the line where the x-axis is zero. It might not look like the center of the image but that's because we have a camera angle that determines our viewpoint. Your viewpoint will most certainly be different than this image and that's fine.
The TR() function
TR() is a function Piter wrote to make numbers range from 1 to -1 to 1 over and over again. It can be used to modify the basic shapes in a number of ways. For example by applying TR() to the x-axis in the formula:
L(TR(x),y)-.5
The way this works is that TR() is making the x-parameter range from 1 to -1 to 1 for every location in the 3D space. So now we automatically get cylinders drawn along a lot of lines where x is zero, which is great.
We can do this in y-axis instead if we want:
L(x,TR(y))-.5
See how that produces the same effect, but in a different dimension. Fascinating. And it works in both dimensions at the same time too:
L(TR(x),TR(y))-.1
If you look closely at the formula above, you'll notice that I reduced the size to .1 (was .5 in the prior examples). This produced a more aesthetic look IMHO, and I mention it to illustrate that small changes like that can have a tremendous effect on the final result. Take time to play around with the numbers in the formulas to explore the effect they have on the result.
The B() function
B() returns the absolute value of the input. It is useful to duplicate something exactly once, creating two objects. It can be called like this for example:
B(x)-a
Arguments
x: value to get absolute for
a: Distance between the two copies of the object
Example
Let's take a single cylinder and apply B(x) to copy the object:
L(B(x)-3,y)-2
We now got two cylinders. If we want we can copy in the y-axis too, just for fun:
L(B(x)-3,B(y)-3)-2
So now we got a stack of four cylinders, oriented in a two-by-two grid.
Want more? Just wrap you B-function calls in even more B-function calls, like this:
L(B(B(x)-3)-3,B(y)-3)-2
Now you got six cylinders.
The mod() function
mod() stands for modulo and will modify the input value so it ranges between two values.
mod(x, m)
Arguments
x: value to modulate
m: Amount of modulation
Example
Let's use our cylinder and apply mod() in the x-axis. And subtract 2 from the result just because that makes the result look better in this case:
L(mod(x,4)-2,y)-.5
Moving shapes around
You don't necessarily want to draw everything centered around the 0,0,0 point, which is what happens by default. It's very easy to move shapes around though. Just add or subtract values from the x,y,z coordinates of the shape.
As an example, let's take the SDF for the box:
bx3(x,y,z,10)
If we instead modify the coordinates like this, we get a box that's off center:
bx3(x-15,y-10,z+5,10)
Stretching shapes
The cl() function
cl() stands for clamp and is a way to limit the possible values of a given input to be within a predefined range. Piter shared a neat trick in the official documentation for how to stretch objects using cl() to modify x, y, and/or z:
x-cl(x,a,b)
Arguments
x: Value to clamp
a: Lower bound
b: Upper bound
Example
don(x-cl(x, -15, 15),y,z,15,5)
Our trusty donut, this time with the clamp trick applied in the x-axis to stretch the shape.
Combining shapes
Being able to draw, repeat and stretch individual shapes is fine, but an art piece has so much more than just a single shape (unless it's not a pipe, you know). Combining shapes can produce lots of really interesting results.
The U() function
The union function U is your friend when you want to combine shapes and do a lot of stuff in a single SDF-powered art piece. U is an alias for min because, you know, blockchain storage is expensive (the SDF code is stored onchain) and Piter is all about code minimization. The reason taking the minimum value lets you combine shapes is because SDFs are all about measuring the distance to objects. If you have two or more objects in the scene, the SDF still only needs to return the distance to the closest object (the minimum of the distances to all the objects).
Using U you can chain together as many shapes as you want, modified in lots of different ways, to produce a final artwork. There are other ways to combine shapes too of course, but let's see what we can do with U first.
In terms of arguments, this function takes minimum one and can take up to many arguments. Don't be afraid of chaining lots of calls inside U.
Let's take a box and a cylinder and see what we get:
U(
L(x,y)-5,
bx3(x,y,z,8,12)
)
Cool, it's a hammer! What's happening here is that for every point in the 3D space, the entire SDF is evaluated, and the smallest value from either of the two shape functions is used as the final value. And you can still apply all the other tricks in the book at the same time, like repeating shapes for instance:
U(
bx3(mod(x,8)-4,y,z,4),
L(TR(x),y)-1
)
Nice! We used a box that was repeated in the x-axis with a cylinder that was repeated in the same axis. Let's see what we can get by adding even more shapes.
U(
bx3(mod(x,8)-4,y,z,4),
bx3(x,y,mod(x,8)-4,4),
L(TR(x),y)-1,
L(x+20,y-20,z-20)-8
)
In this example I've combined four shapes. Two are repeated using TR() and one using mod(). There's only one sphere but I've moved it off center by adding and subtracting values from x,y,z.
Where to go from here
The first rule of Universal Rayhatcher is to experiment! Use the shapes and techniques mentioned and combine them in various ways. Have fun with it :)
By now you've seen enough SDF code that you can start to dissect what artists are doing in their various Universal Rayhatcher mints. Take a look at the great gallery of mints and the code of each piece to dive deeper. I also recommend using the official documentation to expand your horizon further. There's a lot more cool stuff to experiment with, like noise, macros and more!
I'll leave you with my first Universal Rayhatcher creation and the full code for it. The code snippet could be more optimized, do you see how? There's at least one piece of advice given in this article that this SDF code snippet does not adhere to :)
[x,y]=r0(x,y), [y,z]=r1(y,z), @xyz{$=mod($,8),} cl(x-.2, min(min(min( bx2(L(x,y)-2,z,1), L(x,y-3,z-5)-1.5), L(k(x,y),z)-2), B(L(y,x)-.8)))*.02
project name project name project name
FAQ
Here are some common issues that might happen and ways to resolve them.
SyntaxError?!
Did you forget a comma? Add a parenthesis too much? SDF coding is quite strict in this sense, it requires attention to the small details to work. Use the Undo function to go back to a working version and try again. Undo is also available as the keyboard shortcut ctrl-, and you can redo with ctrl-.
I only see parts of the shape
Size of each shape depends on both the SDF code, the minter address and the title seed. First try changing the arguments of the shape in the SDF code to reduce the size of it. If that doesn't change it enough, try with a different Title Seed. Lastly, you can use rotation logic to change the scene (warning: rotates everything, not just one object).
I got a blank white screen
This can happen if you make a change that shifts all numbers returned by the SDF too far. For example if the SDF returns only positive results for any x,y,z position. Take a hard look at what you just changed and see if you can reduce the effect of it. Or hit the undo button to get back to the previous version.
Another reason for this issue can be that you set Mist Start Dist bigger than Max March Dist, in case you're already busy experimenting with the sliders :)
I get weird purple artifacts while drawing
This happens sometimes in Chrome at least, especially if you switch tabs while its drawing. Just wait for the scene to complete drawing and they'll be gone.