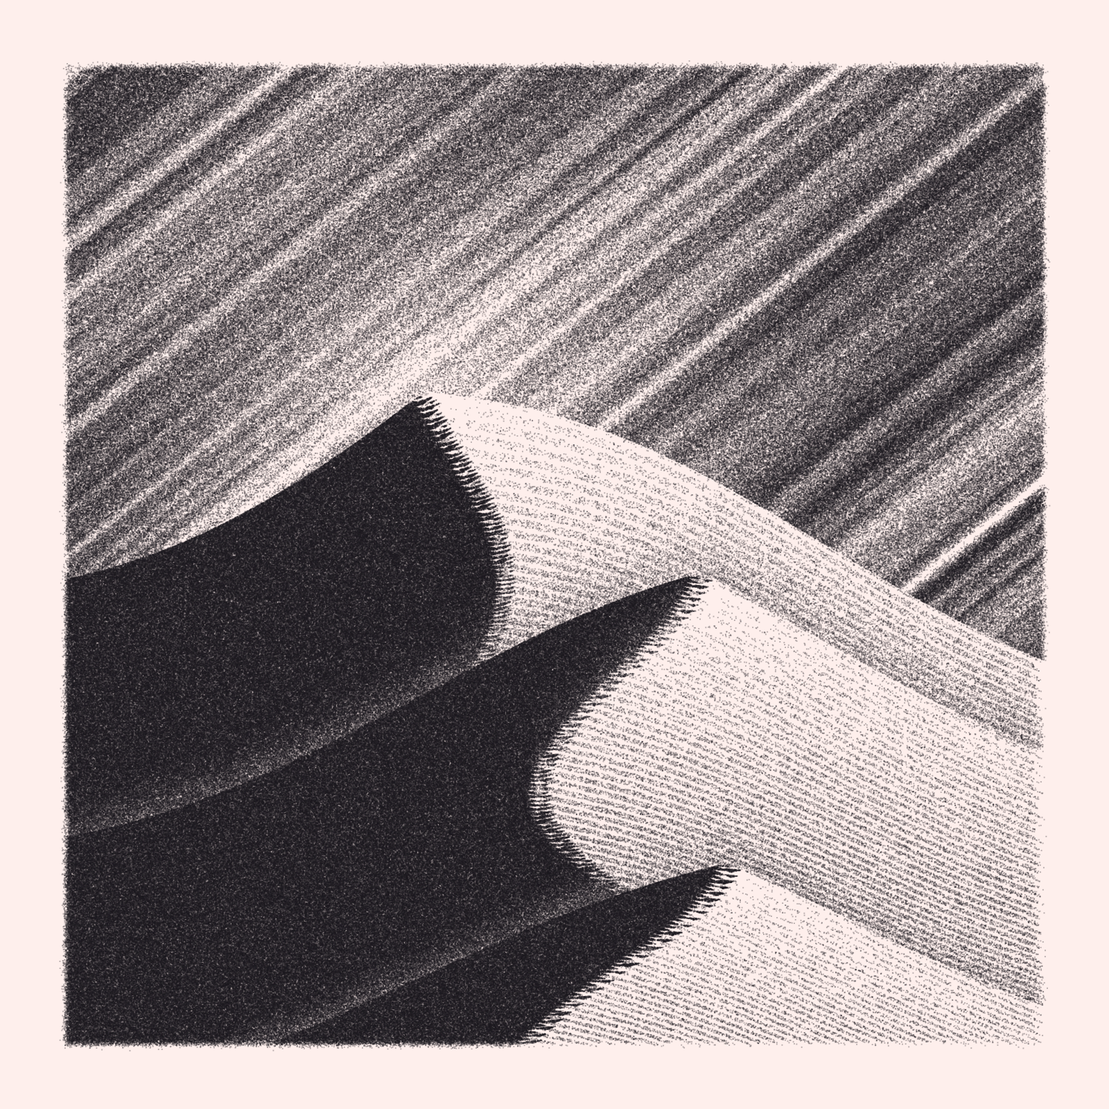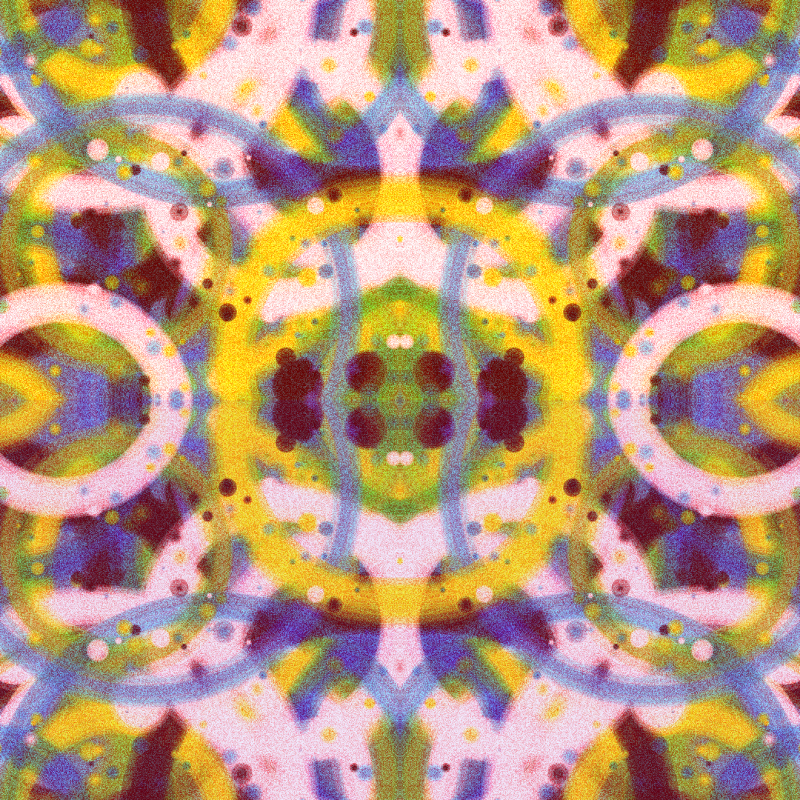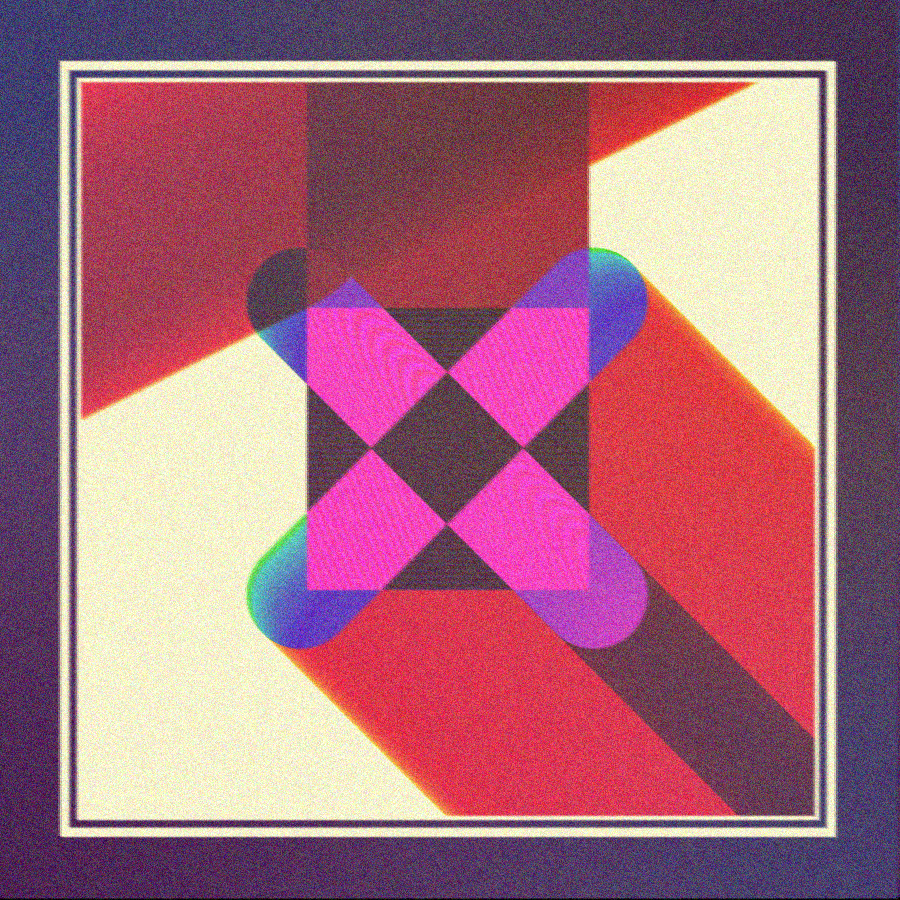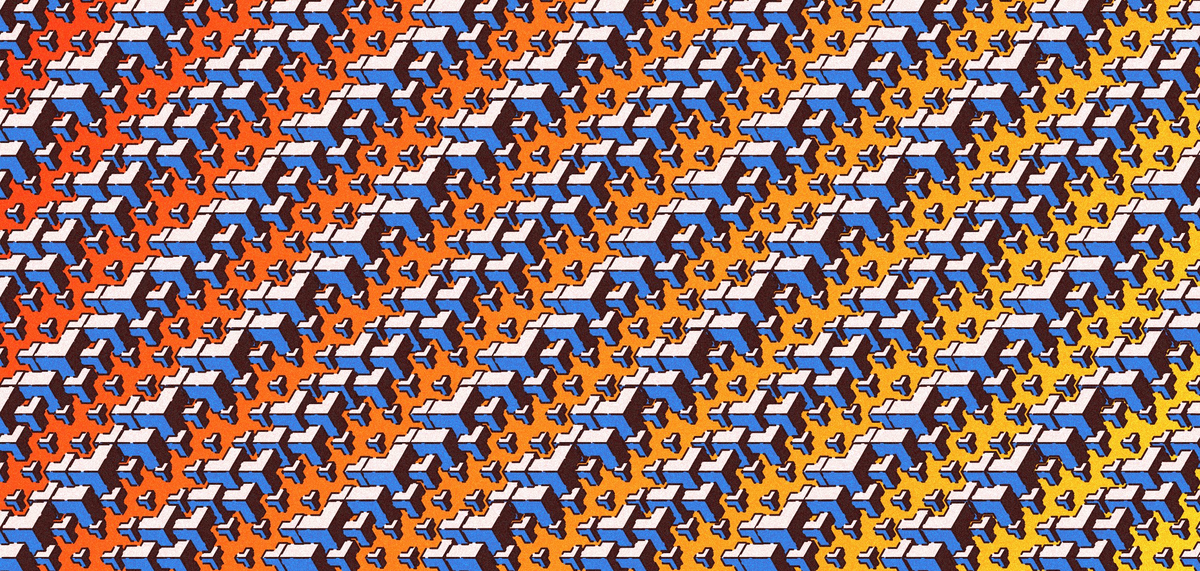
All about that grain
written by Gorilla Sun
This article is brought to you by Gorilla Sun and meezwhite. Lots of love and time went into the making of this article, we hope that you enjoy it, learn something new and that it inspires you to make some art!
What is Grain?
The term “grain” arguably stems from the random optical textures often seen in early photography and cinematography from an era long past. In that setting, we refer to this texture as “film grain” - a natural byproduct of the technology utilized to capture images.
Film grain or granularity is the random optical texture of processed photographic film due to the presence of small particles of a metallic silver, or dye clouds, developed from silver halide that have received enough photons. (Film grain, Wikipedia, retrieved on August 29, 2022)
Modern digital cameras generally don’t suffer from this side-effect anymore; most modern devices will immediately apply some form of noise reduction whenever an image is taken and attempt to capture unaltered slices of reality. Image grain, however, still finds its way into contemporary photography, nowadays primarily as a purposeful stylistic choice and often with the intent to evoke somewhat of a retro and nostalgic feel. Grainy textures also can be found in digital and generative art, usually used as a tool to add depth and tactility to artwork.
A noteworthy example for this in generative art, is the sketch “ᴄᴏɴᴄᴇᴘᴛ” by Shvembldr:
Shvembldr was experimenting with generative blockchain art during that time, where collectors could mint an interactive token that generated new art with every click. Another gripping thing about this sketch was its grainy texture:
GorillaSun: The above sketch by Shvembldr was the original inspiration for experimenting with grain using the p5 pixel array. I found it in a post on the r/generative subreddit where the comments were discussing strategies to recreate the grainy texture that Shvembldr had made:
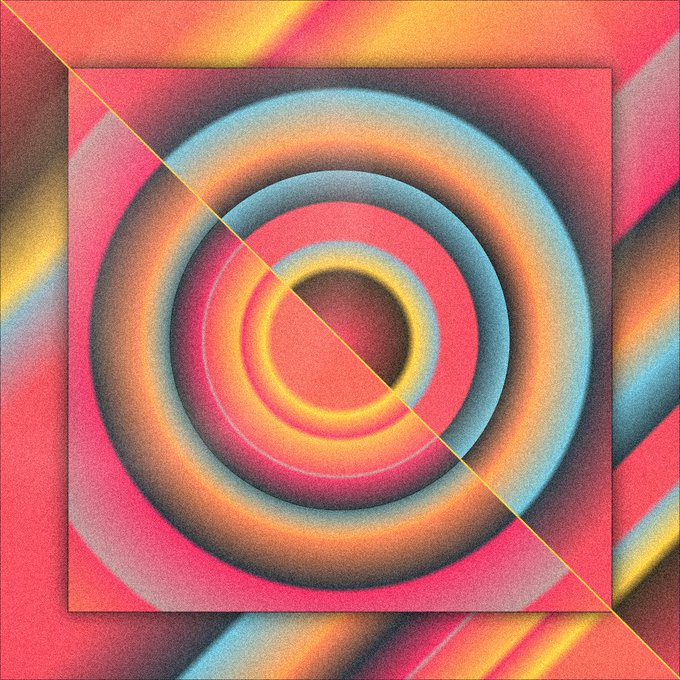
I quickly coded up a little function that could generate this type of grain and tried it out on a sketch that I was already working on:
Later I used this grainy texture in several other sketches:
project name project name project name
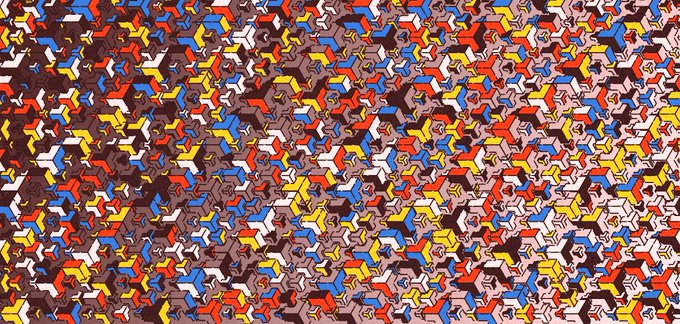
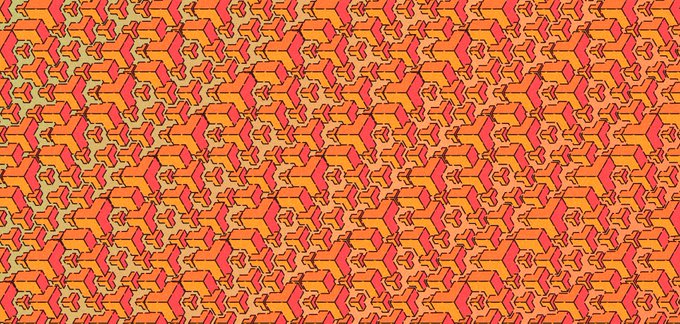
meezwhite: The first pieces I saw when I came across fxhash were lunarean’s Solace and GorillaSun’s Microcosm tokens. They were also the first two pieces I saw to incorporate grain in one way or another; both were a major inspiration and the reason I started looking more into fxhash.
project name project name project name
With my "Retrospect", I was thinking about the intentionality of decision-making and its impact. The artwork already had a seemingly retro look before adding grain and fuzzifying it. However, contemplating the past made me also think about how things looked in the past. I decided to inflict damage to the artwork to have it look imperfect and shaky as if printed with an old printer. The grain was a needed addition reflecting the technology of the past, especially image noise previously more prevalent in digital photography.
After I added the effect, I became unsure of my decision. “Do I want to defect my artwork?” I asked myself. In the end, I let it be since the whole thought process of causing fuzziness plus the uncertainty of my decisions fit the concept behind the artwork. Additionally, I mixed in a filter layer of carefully picked 70s colors to further express the past. Here’s how it came out:
project name project name project name
In this manner, Shvembldr’s sketch is the original inspiration for this technique, and this article would not exist without it. In the following sections we’ll go over a number of different techniques with which one can achieve grainy textures in p5js, including the original pixel manipulation method shown here.
Techniques
We will now look at a few techniques that allow you to apply grain or grainy textures to your artwork. For the following examples we mainly utilize p5js, in addition to some examples requiring a little use of HTML and CSS. We’ve prepared a little grainless sketch as a template and reuse it throughout the sections to showcase the different types of grain effects. Here is the output of our template:
Pixel Manipulation
Pixel manipulation involves iterating over each individual canvas pixel and offseting their RGB(A) values with small random numbers within a given range. You would usually apply this grain after the artwork has finished drawing, and it can sometimes result in a skew to the artwork’s overall brightness and/or tint, depending on what kind of randomness you use and how you distribute these small numerical perturbations to the RGB(A) components. In this sense there isn't only one way of modifying the pixel values, allowing you to get as creative (and crazy) as you want here.
The snippets of code presented in this section require you to access p5’s pixels array via the loadPixels function. If you’ve never done this before, a good starting point would be Daniel Schiffman’s tutorial on this topic:
A small detail to remember is that RGB values generally range from 0 to 255, and modifying them beyond these limits will usually constrain them to the minimum or maximum value. Of course, when using different color modes, the respective bounds apply.
Another small detail you might want to consider is whether you want to modify the alpha value of pixels since that is also possible (the fourth component). In most cases, you won’t need to.
Below are a few examples how you could implement and use this technique with p5.js. However, we invite you to experiment, be creative and create your custom pixel manipulation variant that suits you and your artwork.
One Pixel, One Modifier
Simply put, this technique modifies the shade of every canvas pixel to become randomly darker or brighter based on a given amount.
To achieve this effect, pass an amount parameter to the granulate function. Then, for every pixel, generate a random from-to value (the modifier) using the given amount parameter and add the random value to every RGB(A) channel respectively. We’ll call our modifier grainAmount in this case.
granulate(amount) {
    loadPixels();
    const d = pixelDensity();
    const pixelsCount = 4 * (width * d) * (height * d);
    for (let i = 0; i < pixelsCount; i += 4) {
        const grainAmount = random(-amount, amount);
        pixels[i] = pixels[i] + grainAmount;
        pixels[i+1] = pixels[i+1] + grainAmount;
        pixels[i+2] = pixels[i+2] + grainAmount;
        // comment in, if you want to granulate the alpha value
        // pixels[i+3] = pixels[i+3] + grainAmount;
    }
    updatePixels();
}
You can see how the function proportionately modifies every RGB(A) channel using the same random value grainAmount. The amount parameter of the function specifies what value at the most (or the least) a pixel should be modified by, consequently becoming brighter or darker. For example, a pixel with the RGB values (178, 203, 109) and a grainAmount value of -13 would be modified to have the RGB values (165, 190, 96).
Let’s see how this technique applies to our little sketch. Applying the function is as easy as calling e.g. granulate(50) after finishing drawing the artwork. Below you can see the output of after applying this technique. Notice how the pixels that previously shared a color now display slightly different shades of that color.
🤓 Before applying this technique to your artwork, please make sure you’ve read the “When to use, when not to use” section of this article.
One Pixel, Multiple Modifiers
This technique uses multiple random values for every pixel to modify the RGB(A) channels separately.
To achieve this effect, pass an amount parameter to the granulate function. Loop over every canvas pixel, and for every RGB(A) channel generate a random from-to value (multiple modifiers) using the given amount parameter. Finally, add the random values to their respective RGB(A) channels.
function granulateChannels(amount) {
    loadPixels();
    const d = pixelDensity();
    const pixelsCount = 4 * (width * d) * (height * d);
    for (let i = 0; i < pixelsCount; i += 4) {
        pixels[i] = pixels[i] + random(-amount, amount);
			  pixels[i+1] = pixels[i+1] + random(-amount, amount);
			  pixels[i+2] = pixels[i+2] + random(-amount, amount);
        // comment in, if you want to granulate the alpha value
		    // pixels[i+3] = pixels[i+3] + random(-amount, amount);
	  }
	  updatePixels();
}
Compared to the previous granulate function, you can see how this function uses separate modifies for every RGB(A) channel. The amount parameter of the granulate function specifies what value at the most (or the least) an RGB(A) channel should be modified by, which modifies it’s value to be higher or lower respectively. This way the pixel color will now and then be drastically modified so that it becomes a color with a completely different hue.
To make things interesting, we’ve got a challenge for you:
💪 Spice up or completely change the modifiers expressed as random(-amount, amount) and implement something of your own – pretty much anything goes. If you need a little bit of inspiration, how about using the counter i (for inspiration).
Now let’s see how using multiple modifiers changes the output of our sketch. To use this technique, we’ll call granulateChannels(50) after drawing the artwork. Below you can see the output after applying this technique. Notice how the pixels that previously shared a color now either have a shade of that color or sometimes display a completely different color.
Mixed Distribution
This technique is similar to the previous one, using multiple modifiers for every pixel. The main difference is that the present one uses different modifiers with significantly different modification strengths for each channel. Consequently, this has the effect that the color value is shifted more towards the color channels where the modifier strength is higher.
To achieve this effect, use the same approach from the previous technique but with various modifiers having significantly different strengths. For instance, the following function will apply a red shift to the colors.
function granulateRedShift(amount) {
    loadPixels();
    const d = pixelDensity();
    const pixelsCount = 4 * (width * d) * (height * d);
    for (let i = 0; i < pixelsCount; i += 4) {
        pixels[i] = pixels[i] + amount;
				pixels[i+1] = pixels[i+1] + random(-amount, amount);
				pixels[i+2] = pixels[i+2] + random(-amount*2, amount*2);
        // comment in, if you want to granulate the alpha value
        // pixels[i+3] = pixels[i+3] + random(-amount*2, amount*2);
	  }
	  updatePixels();
}
As you can see from the function, the amount value is always added to the red pixel channel. On the other hand, the green and blue channels are still randomized, albeit the blue channel has the chance of being modified stronger than the green channel because of its modifier limits. Nevertheless, combining red and blue colors results in violet colors. There is more to it but all in all, this function achieves the desired redshift effect.
To use this technique, we’ll call granulateRedShift(50) after drawing the artwork. Here’s the output after applying this technique to our example sketch. Notice how compared to the previous result, previously lighter zones have now especially become redder. Furthermore, the colors also seem less muddy or dull. The artwork sure gets your attention now.
Fuzzify + Granulate
The following example fuzzifies the canvas pixels and then uses the multiple modifiers technique to granulate the artwork. It shows how you can also directly intervene in the pixels array besides granulating the artwork.
This function modifies pixels in two steps. For every pixel in the pixels array:
- Select a pixel that lies on the next row and a few more pixels further in the pixels array. Then, set the current pixel value to the average of the current pixel value plus the selected pixel value.
- Apply the same “One Pixel, Multiple Modifiers” technique mentioned above.
function granulateFuzzify(amount) {
    loadPixels();
    const d = pixelDensity();
    const fuzzyPixels = 2; // pixels
    const modC = 4 * fuzzyPixels; // channels * pixels
    const modW = 4 * width * d;
    const pixelsCount = modW * (height * d);
    for (let i = 0; i < pixelsCount; i += 4) {
        const f = modC + modW;
        // fuzzify
				if (pixels[i+f]) {
		        pixels[i] = round((pixels[i] + pixels[i+f])/2);
					  pixels[i+1] = round((pixels[i+1] + pixels[i+f+1])/2);
					  pixels[i+2] = round((pixels[i+2] + pixels[i+f+2])/2);
            // comment in, if you want to granulate the alpha value
            // pixels[i+3] = round((pixels[i+3] + pixels[i+f+3])/2);
				}
				// granulate
        pixels[i] = pixels[i] + random(-_amount, _amount);
        pixels[i+1] = pixels[i+1] + random(-_amount, _amount);
        pixels[i+2] = pixels[i+2] + random(-_amount, _amount);
        // comment in, if you want to granulate the alpha value
        // pixels[i+3] = pixels[i+3] + random(-_amount, _amount);
  }
	  updatePixels();
}
To use this technique, we’ll call granulateFuzzify(50) after drawing the artwork. Here’s what the output looks like after fuzzifying and granulating it. You might instantly get the feeling something is wrong. But don’t worry, it’s not a grain of dust in your eye it’s just the algorithm.
meezwhite: I created this technique for my token “Retrospect” to give the artwork a slight “retro”, imperfect and shaky feel as if printed with an old printer. I came up with the idea from my old printer, which sporadically creates these well-known double images and shifted lines.
Granulate with get() and set()
Rather than directly accessing the pixel array, p5 also has two neat functions called get() and set(), which can be used to fetch and paste specific portions of the canvas. They can also be used to access and modify the color of individual pixels. This means we can rewrite our granulation function using get() and set() without worrying about different pixel densities simply by iterating over the canvas with a nested loop. This is however a little slower than using the pixel array, the p5 documentation states the following:
Setting the color of a single pixel with set(x, y) is easy, but not as fast as putting the data directly into pixels[]. Setting the pixels[] values directly may be complicated when working with a retina display, but will perform better when lots of pixels need to be set directly on every loop. See the reference for pixels[] for more information. (p5.js reference | set(), retrieved on September 3, 2022)
Additionally, the pixels array documentation states:
Note that set() will automatically take care of setting all the appropriate values in pixels[] for a given (x, y) at any pixelDensity, but the performance may not be as fast when lots of modifications are made to the pixel array. (p5.js reference | pixels, retrieved on September 3, 2022)
Therefore, if you’re not worrying about performance too much, you can use the following function or something similar. We should also mention that using get and set, the output quality will degrade when the pixel density is greater than 1, and it might get slightly chunky and pixelated, which is also kind of nice in certain situations. Once again, we’re using the multiple modifiers technique.
function granulateWithSet(amount) {
    loadPixels();
    for (let x = 0; x < width; x++) {
        for (let y = 0; y < height; y++) {
            const pixel = get(x, y);
            const granulatedColor = color(
                pixel[0] + random(-amount, amount),
                pixel[1] + random(-amount, amount),
                pixel[2] + random(-amount, amount),
                // comment in, if you want to granulate the alpha value
                // pixel[3] + random(-amount, amount),
            );
            set(x, y, granulatedColor);
        }
    }
    updatePixels();
}
One obvious advantage when using the get and set functions, is that the code ends up looking nicer. Just look how clean it is!
Here’s the output when calling granulateWithSet(50) after drawing our sketch. As you can see it is very similar to the grain generated with the granulateChannels function.
Below you can see a comparison between granulating our artwork with granulateWithSet(75) and granulateChannels(75). The difference becomes more noticeable at a higher pixel density. In this example, the sketch uses a pixel density of 4. It seems like get() and set() ignore the higher pixel density.
We can see below that applying grain with get and set doesn’t take into account the pixel density. The output below was rendered at a pixel density of 1 and the generated graphics seem to be of similar quality.
Here are some advantages and disadvantages to consider when using the pixel manipulation technique to apply grain to your artwork:
Advantages:
- It’s simple: You only require a simple function that you can call after you’ve finished drawing your artwork.
- saveCanvas(): Since pixel manipulation directly alters the canvas image data, the grain is included in the output when saving the canvas.
- fxpreview(): The previous advantage also applies to fxhash projects when capturing the preview image. After adding grain to your canvas, you can capture the preview of your token right away, and the captured preview will contain the grain.
Disadvantages:
- Too simple: Because it is so easy to implement, you can easily overdo it and degrade the aesthetics of your artwork. Read more on this in the “Considerations” section.
- Performance-heavy: The pixel manipulation technique requires noticeable computation time, depending on your sketche’s frame rate and your artwork’s canvas dimensions. For instance, when using the multiple modifiers technique, the random function will be called multiple times for every pixel. Therefore, it isn’t the best technique for animated or interactive artworks. Even if you use a low frame rate or small canvas dimensions, you would still probably encounter performance issues – your animation would be laggy. (It’s very slow on mobile devices)
- Animations: As already mentioned, this technique isn’t recommended for animated or interactive artworks, unless maybe you draw your grain once after the animation has finished. We don’t recommend granulating the artwork on every frame.
- Deterministic grain: When performing pixel manipulation using the random function, every time you load the artwork, the grain will look different, unless you are using a deterministic random function. Even then, your grain might only be semi-deterministic, not fully-deterministic. We talk more about what this means in the “Deterministic grain” section.
Texture overlay
As the name suggests, this technique involves blending a texture onto the artwork. Usually, the texture is an image (e.g. PNG, JPEG) or an SVG element. Using SVG elements as the texture is further discussed in the next section. In this section we’ll explore two methods with which you can use an image as an overlay for your sketch.
Texture overlay inside canvas
The first possibility involves drawing a texture image onto your entire artwork using different blend modes. Using the textureOverlay function below, you can achieve this by passing the texture image and optionally specifying the blend mode onto which you’d like to apply the texture.
let texture;
function preload() {
    texture = loadImage('texture.jpg');
}

function setup() {
    drawArtwork();
    textureOverlay(texture);
}

function textureOverlay(texture, mode) {
    let textureX = 0;
    let textureY = 0;
    blendMode(mode || MULTIPLY);
    while (textureY < height) {
        while (textureX < width) {
            image(texture, textureX, textureY);
            textureX += texture.width;
            if (textureX >= width) {
               textureX = 0;
               textureY += texture.height;
               break;
            }
        }
    }
}

function keyPressed() {
    // Press [S] to save canvas
    if (keyCode === 83) {
        saveCanvas('export.png');
    }
}
💡 If you are developing on a local machine and using preload like above to load images or other assets, you need to spin-up a local web server. There are many possibilities for how you can run a local web server on your machine: e.g. XAMPP/MAMP, “Live Server” VS Code or browser extension, webpack-dev-server, etc. Alternatively, you can use the p5.js Editor or create a sketch on OpenProcessing. You can read more about this here: https://github.com/processing/p5.js/wiki/Local-server (retrieved on August 29, 2022)
The image below shows a comparison of the outputs after having grain blended onto the canvas using the above textureOverlay function. In the left corner of every section, you can see a fragment of the texture image applied to the canvas, and at the bottom area, you can see the blend mode used.
As you can see in the comparison above, the grain becomes more pronounced as you progress to the right section, where the DIFFERENCE blend mode is the most “harsh” – which doesn’t have to mean it’s worse; it depends on what YOU want to achieve. It also seems that the grain is also not as sharp as when generated with the pixel manipulation technique.
We can see in the comparison image above when using a texture image with a black background, the blend modes EXCLUSION and DIFFERENCE seem to work well. On the other hand, when using a texture image with a white background, like the one in the middle section, the blend mode MULTIPLY seems do the job. Although generally darker images should have smaller file sizes, you won’t always have an easy time applying the blend modes EXCLUSION and DIFFERENCE.
One advantage of this technique is that you are not limited to applying "only" grain to your artwork but can blend over any texture you could imagine. Depending on where your strengths lie, you will find it easier to create texture images with, for instance, Photoshop or via code. But be advised, creating textures isn’t always a piece of cake. Furthermore repeating textures might appear… well, repetitive, and that can easily become boring.
In any case, you might soon realize that this technique isn’t always that easily mastered. You might encounter some of the following challenges:
- Textures don’t repeat as wished. For such cases, we have prepared an extended textureOverlay function which provides the possibility to reflect or flip the texture horizontally and vertically, to provide seamless continuity when repeating textures. Even then, you’ll have to experiment, as not all texture repetitions might be visually appealing.
- Colored textures modify the artwork colors in undesirable ways. This issue isn’t that apparent when using a simple grain texture with a black or white background, however, when large parts of the texture contain particular colors and because of how the blend modes work, the colors of the underlying artwork are modified undesirably or too much. In such cases, you could try using a grayscale texture on a white background and MULTIPLY them with the artwork. However, experiment and use the settings that best work for your artwork.
The following example uses a grayscale custom texture that contains grains and some film-like residues. The texture is blended over the artwork using our extended textureOverlay function like so: textureOverlay(texture, { reflect: true }). The second parameter is the configuration object which right now specifies that the texture should be reflected horizontally and vertically. If you look carefully at the output below, you might recognize the texture reflection.
🙌 The extended textureOverlay function is part of our p5.grain library (https://github.com/meezwhite/p5.grain). It’s an amazing library that we’re really exited about! It will make it very convenient to apply grain to your artworks when using p5.js. We’d appreciate any kind of love and support and consider collecting a copy of this article!
Texture overlay outside canvas
Another approach is using an HTML element for the texture and position and blending it over the canvas using CSS. This technique of having the texture image outside the canvas should theoretically be more performant than the pixel manipulation or the texture overlay inside the canvas technique, especially when you’d like to animate the texture. In turn, this enables having grain on animated or interactive artworks or even animating the grain itself, similar to film grain, without too many performance headaches. Let’s have a closer look how we can achieve this.
Firstly, we create a div element inside our main element, where our canvas will be rendered and give it an id such as “texture”. This will also help with lazy loading the texture before our sketch is executed.
<!DOCTYPE html>
<html>
<head>
    <meta charset="UTF-8">
    <link rel="stylesheet" href="./style.css">
</head>
<body>
    <main>
        <div id="texture"></div>
    </main>
    <script src="./p5.min.js"></script>
    <script src="./sketch.js"></script>
</body>
</html>
Secondly, we want to style the texture element with the appropriate CSS properties. In the snippet below we’re making sure that the texture element stretches over the entire screen, is above any other DOM element, uses the texture image as its background image, repeats the texture image on both axes and the size of the texture image is half of the actual image size (this will make the texture look crispier in our case). Most importantly, we style the texture element to use the MULTIPLY blend mode.
html, body, main {
    margin: 0;
    padding: 0;
}
canvas {
    display: block;
}
#texture {
    /* pointer-events: none; */
    position: fixed;
    z-index: 99;
    top: 0;
    left: 0;
    margin: 0;
    padding: 0;
    width: 100%;
    height: 100%;
    background-image: url('./texture.jpg');
    background-repeat: repeat repeat;
    background-size: 128px 128px;
    mix-blend-mode: multiply;
}
As you can see the property pointer-events: none is commented out. You’ll only need it when you attach pointer events (mouse or touch events) directly to the canvas, for instance like so: myCanvas.mousePressed(handleMousePressed). The property will allow pointer events to bubble through the texture element to the canvas element to which events are attached. However, you will not need it when using a global mousePressed function in your sketch or if you attach events directly to the texture element like so: textureElement.mousePressed(handleMousePressed).
Since we’re doing everything related to the texture outside of the canvas, we don’t have to worry about it inside our sketch. Here’s the output of our sketch when using this technique.
The main drawback of this technique is that since the grain texture is outside of the canvas and not part of it, when we’re trying to save the canvas using p5’s saveCanvas function the texture is not included in the output image. Our solution to this issue is to temporarily draw the texture image onto the canvas using the textureOverlay function and then saving the canvas.
function keyPressed() {
    // Press [S] to save canvas
    if (keyCode === 83) {
        textureOverlay(texture);
        saveCanvas();
    }
}
Note that you might have to adapt the textureOverlay function provided in this article to use only half the texture width and height as, if you recall, we have done so in CSS to make our texture look crispier. It will be easier to use the extended textureOverlay function that is part of the p5.grain library which will enable you to pass a configuration object where you can specify the texture width and height like so:
function keyPressed() {
    // Press [S] to save canvas
    if (keyCode === 83) {
        textureOverlay(texture, {
            width: textureWidth,
            height: textureHeight,
        });
        saveCanvas('export.png');
    }
}
Animating texture
There are different ways you can animate the texture overlay. Essentially, you are applying transformations that influence for instance the starting position, the scale or even the rotation of the texture overlay, and you are controlling the speed of the animation by applying transformations to less or more frames, e.g. every other frame. Your main p5 tools therefore are translate(), scale(), rotate(), push() and pop(), frameRate() and frameCount.
With the p5.grain library you can easily overlay a texture onto the canvas and animate like so:
And in case you are using the texture overlay outside the canvas technique, you can simply call textureAnimate(textureElement) using the p5.grain library. This will randomize the background-position of the texture element. Eazy Peazy Lemon Squeezy! 🍋
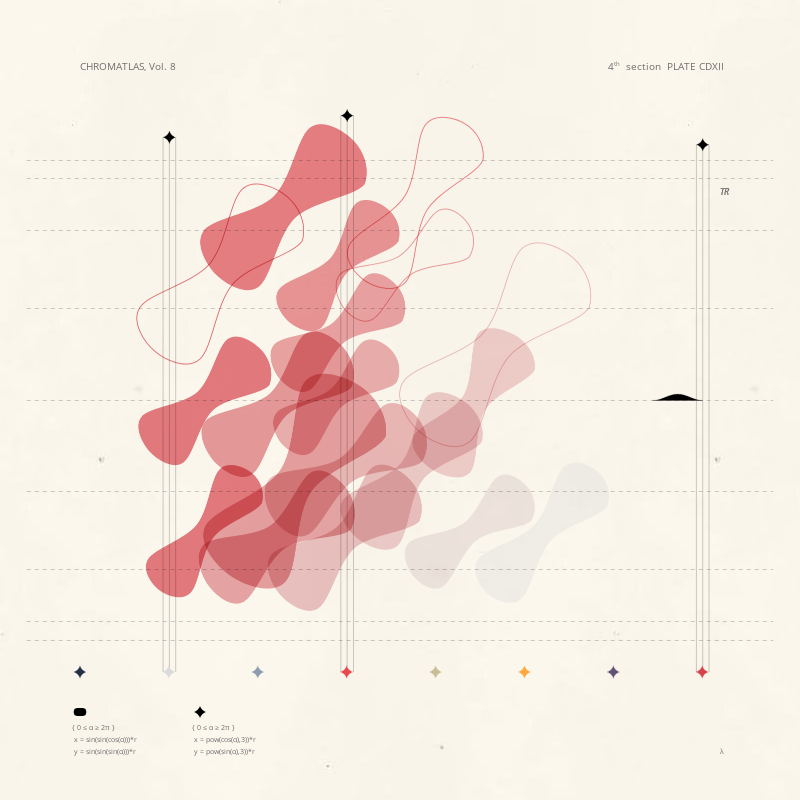
Here’s a real world example; CHROMATLAS, Vol. 8 #279 by Aleksandra:
project name project name project name
Some advantages and disadvantages to consider when using the texture overlay technique:
Advantages:
- Better performance: It’s generally faster to apply than the pixel manipulation method, which can take a few seconds depending on the device you’re viewing the artwork on.
- More options: You can overlay different textures or transparent film grain images and even create your own in, for instance, Photoshop. You can also experiment with different blend modes for different results.
- Animations: In case you want to apply grainy textures to an animated or interactive artwork, this technique is a good option. You can even animate the texture itself without experiencing performance issues.
Disadvantages:
- Sharpness: The texture might sometimes not be as “sharp” as the pixel manipulation technique. You will sometimes have to adapt the resolution of the texture overlay for it to look good and consider different pixel densities of devices.
- saveCanvas(): When positioning the overlay outside of the canvas with HTML & CSS, you require an extra step when saving everything together as an image.
- fxpreview(): Furthermore, when positioning the overlay outside the canvas, you must ensure that the grain will be captured for the fxhash preview image.
SVG filters
Noise textures can also be achieved with the feTurbulence SVG filter. SVG filters can come in handy when you don’t have access to the rendering context or shaders, but can sometimes be difficult to work with as they have their own issues. Overlaying a noisy SVG texture on top of your canvas element can be done in two manners.
One way would be adding the SVG element straight in your html and using it as an overlay similar to what we saw in the previous section:
<main>
    <svg id="texture" xmlns="http://www.w3.org/2000/svg">
        <filter id="textureFilter" x="0" y="0" width="100%" height="100%">
            <feTurbulence type="turbulence" baseFrequency="1"></feTurbulence>
        </filter>
        <rect x="0" y="0" width="100%" height="100%" filter="url(#textureFilter)" />
    </svg>
</main>
We are again making sure to stretch the texture SVG element across the entire browser view.
#texture {
    /* pointer-events: none; */
    position: fixed;
    z-index: 99;
    top: 0;
    left: 0;
    margin: 0;
    padding: 0;
    width: 100%;
    height: 100%;
}
The second method would be to URL-encode the SVG element using a converter like this one (simply copy & paste the SVG element code), which will give you a url string that looks something like the following:
url("data:image/svg+xml,%3Csvg id='texture' xmlns='http://www.w3.org/2000/svg'%3E%3Cfilter id='textureFilter' x='0' y='0' width='100%25' height='100%25'%3E%3CfeTurbulence type='turbulence' baseFrequency='1'%3E%3C/feTurbulence%3E%3C/filter%3E%3Crect x='0' y='0' width='100%25' height='100%25' filter='url(%23textureFilter)' /%3E%3C/svg%3E");
To apply the SVG filter we can use HTML and CSS similar to the previous “texture overlay outside canvas” technique. However, instead of using a texture image, this time we’re using the URL-encoded SVG like so:
#texture {
    /**
     * ... include the same CSS statements as before plus these lines
     */
    background-image: url("data:image/svg+xml,%3Csvg id='texture' xmlns='http://www.w3.org/2000/svg'%3E%3Cfilter id='textureFilter' x='0' y='0' width='100%25' height='100%25'%3E%3CfeTurbulence type='turbulence' baseFrequency='1'%3E%3C/feTurbulence%3E%3C/filter%3E%3Crect x='0' y='0' width='100%25' height='100%25' filter='url(%23textureFilter)' /%3E%3C/svg%3E");
    background-repeat: repeat repeat;
    background-size: 128px 128px;
    mix-blend-mode: multiply;
}
The HTML file looks pretty much the same, however we’re not using an SVG element, since we’re including the SVG filter using CSS:
/* before: SVG element method */
<main>
    <svg id="texture" xmlns="http://www.w3.org/2000/svg">
        <filter id="textureFilter" x="0" y="0" width="100%" height="100%">
            <feTurbulence type="turbulence" baseFrequency="1"></feTurbulence>
        </filter>
        <rect x="0" y="0" width="100%" height="100%" filter="url(#textureFilter)" />
    </svg>
</main>

/* after: SVG URL-encoded method */
<main>
    <div id="texture"></div>
</main>
Lastly, you also have a few options for controlling what the noise looks like as the filter has a few tweakable attributes, with the main two being the type attribute that controls the generator that creates the patterns and the baseFrequency attribute that controls the scale of those patterns. Regarding the type, you can choose between turbulence and fractalNoise. Type turbulence generates clearly visible ripple-like textures, whereas fractalNoise generates smoother, blurry cloud-like textures.
🤓 Our p5.grain library includes examples how you can achieve the SVG technique whether you decide on using an SVG element or URL-encode the element and use it as a background image with CSS. Currently the p5.grain library only supports animation of SVG filters when using the URL-encoded method.
Some advantages and disadvantages to consider when using SVG grain:
Advantages:
- Fast and doesn’t affect the speed of the sketch, and requires relatively little code to be implemented
- The grainy texture can be tweaked to taste by changing the feTurbulence paramteres, more complicated texture patterns might not be achievable.
Disadvantages:
- Overlaying an SVG element on top of an html canvas element comes with the caveat that it can’t be easily saved as an image, which might be problematic for the fxpreview
Shader
In this section, we’ll look at some GLSL shader code written by none other than Dave! Essentially his grain/noise code replicates the effect we’ve discussed in the pixel manipulation section of this article, but this time with a shader, which is much faster and significantly more performant. If you’re unfamiliar with shaders, they’re small programs that run entirely on your graphics card (GPU) and allow you to perform specific operations simultaneously and in parallel. In this manner, using a shader, we can perform the random pixel perturbations of our grain technique simultaneously rather than iterating over every pixel, one by one (CPU). That also means that applying grain to our artwork becomes magnitudes faster. To better understand the performance difference between GPU versus CPU computations, check out this funny video from MythBusters:
Shader programming, however, isn’t a cakewalk, so there will be a couple of things we have to go over, as well as how to use shaders in combination with p5.
You can find Dave’s shader code here, and a good introduction on using shaders with p5 here, which we’ll briefly cover in this section as well. Let’s start with setting up p5 to utilize Dave’s shader. Dave’s sketch actually also does something similar to what we discussed in the texture overlay section, where the shader draws the grain-ified image onto a separate graphics buffer which gets layered on top of the main canvas. In the setup function we need to create three things: the main canvas, a separate graphics buffer, and the shader.
let mainCanvas;   // the main canvas element
let grainBuffer;  // the graphics buffer to be layered onto the main canvas
let grainShader;  // the shader

function setup() {
    mainCanvas = createCanvas(windowWidth, windowHeight);

    // shaders can only be used in WEBGL mode
    grainBuffer = createGraphics(width, height, WEBGL);

    grainShader = grainBuffer.createShader(vert, frag);
}
First we instantiate the grainBuffer and specify the WEBGL renderer as the third parameter since shaders only work in WebGL mode. As for the shader, we want it to affect its dedicated graphics buffer only. Therefore we will instantiate it on the grainBuffer. The createShader function takes as input two parameters: a vertex and a fragment shader. These can be loaded separately as files inside p5’s preload function, but we can alternatively declare them as strings directly in our sketch.
As for applying the grain shader, it’s similar to applying a texture as an image. For this, we’re using our applyGrain function which handles everything related to applying the grain shader to the main canvas.
let shouldAnimate = true;
function draw() {
    drawArtwork();
    applyGrain();
}
As for the applyGrain function, a couple of things are happening here:
function applyGrain() {
    grainBuffer.clear();
    grainBuffer.reset();
    grainBuffer.push();
    grainBuffer.shader(grainShader);
    grainShader.setUniform('source', mainCanvas);
    if (shouldAnimate) {
        //grainShader.setUniform('noiseSeed', random());
        grainShader.setUniform('noiseSeed', frameCount/100);
    }
    grainShader.setUniform('noiseAmount', 0.1);
    grainBuffer.rectMode(CENTER);
    grainBuffer.noStroke();
    grainBuffer.rect(0, 0, width, height);
    grainBuffer.pop();

    clear();
    push();
    image(grainBuffer, 0, 0);
    pop();
}
Here we’re drawing the result of the grain shader to the graphics buffer grainBuffer like so grainBuffer.shader(grainShader), followed by a shape function that we would like to draw our shader to. Which in most cases is simply a strokeless and centered rectangle. Shaders can also take input parameters (sort of), which can be done by passing values to their uniforms via the setUniform function. We’ll get to these in a second, we can control how the generated noise looks with these parameters in the fragment shader.
As mentioned earlier shader programs have two parts, a vertex and a fragment shader. To put it very simply, the vertex shader’s main responsibility, as its name suggests, is usually the positioning of the polygons in our scene, whereas the fragment shader takes care of coloring the pixels in that scene (it’s also sometimes called a pixel shader). In this manner, the main grain code is within the fragment shader file, and the vertex shader is needed to display this texture correctly. Here is the vertex shader code:
const vert = `
// Determines how much precision the GPU uses when calculating floats
precision highp float;

// Get the position attribute of the geometry
attribute vec3 aPosition;

// Get the texture coordinate attribute from the geometry
attribute vec2 aTexCoord;

// The view matrix defines attributes about the camera, such as focal length and camera position
// Multiplying uModelViewMatrix * vec4(aPosition, 1.0) would move the object into its world position in front of the camera
uniform mat4 uModelViewMatrix;

// uProjectionMatrix is used to convert the 3d world coordinates into screen coordinates
uniform mat4 uProjectionMatrix;

varying vec2 vVertTexCoord;

void main(void) {
  vec4 positionVec4 = vec4(aPosition, 1.0);
  gl_Position = uProjectionMatrix * uModelViewMatrix * positionVec4;
  vVertTexCoord = aTexCoord;
}
`
You can find a good explanation of what each line in this vertex shader means in this resource here, from which we borrowed some comments.
One difficulty with shader programming is that there is no out-of-the-box random number generating function like in p5. In this example, we utilize a widespread random number generating one-liner that handles this for us:
float rand(vec2 n) {
  return fract(sin(dot(n, vec2(12.9898, 4.1414))) * 43758.5453);
}
Although its origin is unclear, you can find this function in Patricio Gonzalez Vivo’s Lygia library. At first, this line of code probably looks like it’s composed of some arbitrary numbers and trigonometric operations. Dave provides a helpful explanation for what’s happening here:
If you are interested more in this random function, you can read a more in-depth explanation about this random function here.
Alright, now we finally get to the actual fragment shader:
const frag = `
precision highp float;
varying vec2 vVertTexCoord;

uniform sampler2D source;
uniform float noiseSeed;
uniform float noiseAmount;

// Noise functions
// https://github.com/patriciogonzalezvivo/lygia/blob/main/generative/random.glsl
float rand(vec2 n) {
    return fract(sin(dot(n, vec2(12.9898, 4.1414))) * 43758.5453);
}

void main() {
    // GorillaSun's grain algorithm
    vec4 inColor = texture2D(source, vVertTexCoord);
    gl_FragColor = clamp(inColor + vec4(
        mix(-noiseAmount, noiseAmount, fract(noiseSeed + rand(vVertTexCoord * 1234.5678))),
        mix(-noiseAmount, noiseAmount, fract(noiseSeed + rand(vVertTexCoord * 876.54321))),
        mix(-noiseAmount, noiseAmount, fract(noiseSeed + rand(vVertTexCoord * 3214.5678))),
        0.
    ), 0., 1.);
}
`
We covered the noise-generating function earlier. We will now cover the main function that creates the grain on the grainBuffer graphics buffer. This function applies the pixel perturbations simultaneously to all pixels from mainCanvas, which will then be copied to the graphics buffer. The variable inColor essentially retrieves the color of mainCanvas at a specific coordinate, where the coordinate is given by the vVerTexCoord, which in turn is passed from the vertex shader and is computed from the two matrices that position the camera.
The variable inColor is a type vec4, which means it has four components and essentially represents the RGB(A) values of a specific pixel. Now we need to add the random perturbations to that pixel by chaining a few operations. The purpose of the clamp function is to keep the RGB values between 0 and 1, because shader RGB components are represented as float values between 0 and 1 rather than 0 and 255. As for the mix function, it’s essentially a linear interpolation function, where we specify the minimum and maximum grain amount range. The first two parameters in the mix function specify the range, and the third parameter is used to weight between those two bounds. Ideally this third parameter is a value between 0 and 1. For example if the minimum range has a value of -20 and the maximum range a value of 20, giving a value of .5 to the third parameter would make the mix function return 0 exactly since it’s the mid point between the two bounds.
Now we need to get this weighting value, and have it be between 0 and 1. One way to do so is by using the fract function, which returns the fractional part of a float number, which is essentialy always a value between 0 and 1 and thus a perfect input to the mix function. For example, passing the number 17.53476 to the fract function would return a value of 0.53476.
Finally, putting everything together, we first generate a pseudo-random number with our rand function, take the fractional part of it such that it’s a number between 0 and 1, then interpolate it to the desired grain amount range with mix, add it to the original color of the pixel on the main canvas and then clamp it to the 0 and 1 range so that the final vec4 ends up being a legal color. Overall, chaining these operations together will return the color of the underlying pixel plus/minus a random amount within the grainAmount range.
And the grain applied to the sketch would then ultimately look like this:
Some advantages and disadvantages to consider when using shader grain:
Advantages:
- Best performance: This technique is vastly superior in speed compared to the pixel manipulation technique. Simultaneously adding pixel perturbations is the main advantage of using a shader.
- Animations: Works very well on animated or interactive artworks. Furthermore, animating the grain produced by the shader is also very easy.
- It also doesn't cause any additional troubles when it comes to saving the artwork, the grainBuffer simply needs to be saved instead since that is where the granulated image is drawn. It should also not cause any problems with fxpreview
Disadvantages:
- Difficult: It might be difficult to fine tune the exact type of grain texture that you want to achieve because it will require you to find or implement different kinds of random number generating methods.
💡 When using this technique it’s a good idea to test your sketch in all major browsers, as some browsers might not fully support WebGL.
Advantages and disadvantages
The table below summarizes the most significant advantages and disadvantages for you to consider when choosing the technique for applying grain or textures to your artwork.
When to use, when not to use: considerations
Aesthetics:
Before applying any of the aforementioned techniques:
- Is this the effect that I want to achieve?
- Does it look good considering my artwork’s style?
- Does it add to my artwork? Does it take away from my artwork?
- Does it improve the aesthetics of my artwork?
- Is the applied effect too much or too little?
- Remember that sometimes less is more and other times more is less.
- But also remember that sometimes less is less and other times more is more. 😂
Gorilla Sun: I’m definitely guilty of overusing this technique. With all of the techniques listed above, it becomes very easy to just slap a grainy texture on top of your sketches to add a little bit of depth and realism. After a while I found myself haphazardly copying the original pixel manipulation snippet into most of my sketches, just because it was a cheap way to make my sketches feel ‘full’ instantly, without regard to the grain actually contributing anything meaningful from an aesthetic point of view.
If you do a little side by side comparison of a grainless sketch and one that has some form of grainy texture, the grainless sketch might appear to be almost glossy and too clean, which is simply a different aesthetic and a natural characteristic of computer generated graphics. There are other ways to create textures without having to rely on grain as a crutch. The same goes for other things like premade color palettes that you can find online and simply slap onto your sketch. Raphaël de Courville, Processing Community Lead Fellow has a very good analogy for this:
All of this is to say, that if you’re relying on tricks like grain or premade color palettes to make your sketches more interesting, it might be a good idea to take a step back and see how your artwork can be made more interesting without them, or alternatively, how you could use them in creative new ways. For example, grain can have a really useful functional purpose when you utilise it to soften shadows and gradients, and it can also be used to glue together layered transparent shapes.
Compression:
Adding grain, noise or certain textures to your artwork can also increase the size of exports on your disk. This is important because generally you want to export your artworks in lossless formats, in the case of images ideally in the PNG format, which can quickly blow up in size when you add random pixel perturbations to the entire canvas. For example a blank grainless canvas at 1080x1080 pixels only takes up a couple kilobites, which can quickly turn into several megabytes when grain is added. Many platforms also have size restrictions which can be problematic as well.
Considering fxpreview() :
Depending on which method you select to capture your previews, as well as the resolution, the grain might become more pronounced on previews with a lesser resolution. Here's a comparison of the viewport preview at 800x800 follower by the preview at 400x400:
Ideally you would use the “From <canvas>” preview to avoid this and have the fxpreview identical in resolution. It also generally looks the best. In the case of an animated project you’ll have to also make sure that the preview is taken at an appropriate moment when the grain is properly shown.
Deterministic grain
Having deterministic grain is a necessity when creating fxhash tokens. In general, your fxhash token should be deterministic. Thus, an iteration of your project should always generate the same output when loaded; such that it always looks the same. Most techniques in this article use the random function in one way or another to either generate the grain or animate the grain. However, p5’s random function and the JavaScript built-in Math.random function are non-deterministic out of the box. To make p5’s random function deterministic, you can set the seed number it should use to generate pseudo-random numbers. There isn’t a possibility to set the seed number for the built-in Math.random function. On the other hand P5 gives you the option to set the seed numbers with the randomSeed and noiseSeed functions respectively.
Deterministic randomness
To achieve deterministic pseudo-randomness in your project and your project is not an fxhash project, you can do the following in your setup function:
const seed = 999999;
randomSeed(seed);
noiseSeed(seed);
When you now call the random or the noise function, the generated numbers will be deterministic. Feel free to use whatever seed number you like. You may also use different seed numbers for randomSeed and noiseSeed.
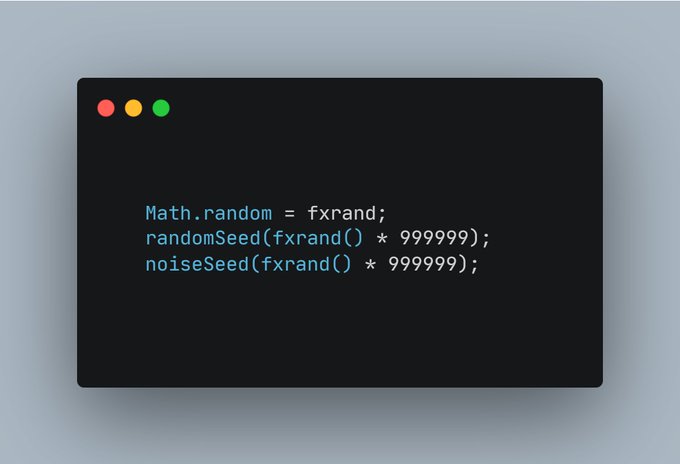
However, for fxhash projects we recommend using this extremely useful and uncomplicated “safeguard” snippet @sableRaph has tweeted about:
It’s important you understand what this “safeguard” snippet does, to prevent a few pitfalls. It does two things:
- It prevents the common mistake of using the non-deterministic Math.random function by replacing it with the deterministic fxrand function.
- It makes p5’s random and noise functions deterministic by deriving the respective seed numbers from the deterministic fxrand function.
You might think that p5’s random function and the fxrand function are interchangeable. However, that is not the case. The above “safeguard” ensures that random() is deterministic. On the other hand, you can interchangeably call Math.random() or fxrand(), and both will yield the same successive random number in line. Therefore we recommend you exclusively use either:
- random() OR
- fxrand() ( alternatively Math.random() )
within your sketch when you adopt the above-mentioned “safeguard” snippet.
Semi-deterministic vs fully-deterministic grain
You can use the above tricks to add deterministic randomness to your p5 sketch or fxhash project. For most, this will suffice. Nevertheless, while writing this article and preparing the p5.grain library, we realized that this type of deterministic grain is not always “fully-deterministic”, but rather just “semi-deterministic”.
What is “fully-deterministic” grain?
“Fully-deterministic” grain means that the applied grain is **always the same** regardless of the artwork resolution, resizing action, artwork animation, or interaction. That does not mean that the grain must be unanimated. Animated grain can also be fully-deterministic.
Most probably, everyone has seen some fxhash tokens, including some of ours, where the grain slightly changes when the browser window resizes. We call this type of grain “semi-deterministic” because it’s not **always the same**. Here’s an example of how semi-deterministic grain behaves:
How to make sure the grain is “fully-deterministic”?
Well, this is actually not an easy task, and it also depends on what technique used. It’s a topic beyond the scope of this article since not only the grain but the artwork as a whole should be “fully-deterministic”. Nevertheless, here’s one valuable tip that will already make your sketch more deterministic: the canvas should have a fixed size (e.g. 4096 x 4096 pixels) and be positioned with CSS so that the browser automatically scales the canvas accordingly on resize. There are several methods how you can achieve this. We’ve found that using flexbox and object-fit: contain on the proper elements works wonders.
We have been thinking about a convenient solution so that you do not have to worry about this anymore and also ensure browser compatibility, especially for Safari, that we hope to release. For now, if you’re having trouble or would like some guidance on this, feel free to reach out to us.
p5.grain library
As you may have noticed from this article, grain for generative art and creative coding is a broad topic. You can choose between multiple techniques to include in your project and all the while having to consider nuances, advantages and disadvantages, and other details such as saving the canvas as a final artwork.
To make it easy and convenient for you to add grain to your art and to experiment with different techniques, we have packed techniques and examples from this article into an OpenSource p5.js library we're calling p5.grain. We are excited about p5.grain and to see what you can do with it!
We want to welcome you to the p5.grain repository on GitHub.
Conclusion
This article discusses several techniques to help achieve grainy textures in your p5 projects. All mentioned techniques should be easily extendable to JavaScript sketches that utilize a canvas element. We have also discussed artistic considerations that you should make before deciding whether grain should become part of your artwork and what it adds to the sketch overall.
If you’re creating a generative token for fxhash, there are also some important things to keep in mind, such as the appearance of your previews as well as making the grainy texture deterministic.
If you’ve enjoyed reading or if it’s inspired you to play around with grain in your own sketches, consider collecting an edition or two of this ARTKL. It helps out a lot! Otherwise you can come say hi to us on Twitter, we've probably already posted some creative coding related stuff over there while you were reading this.
Lastly, check out all the lovely folks we’ve mentioned throughout the sections; they are all fantastic creative coders!
